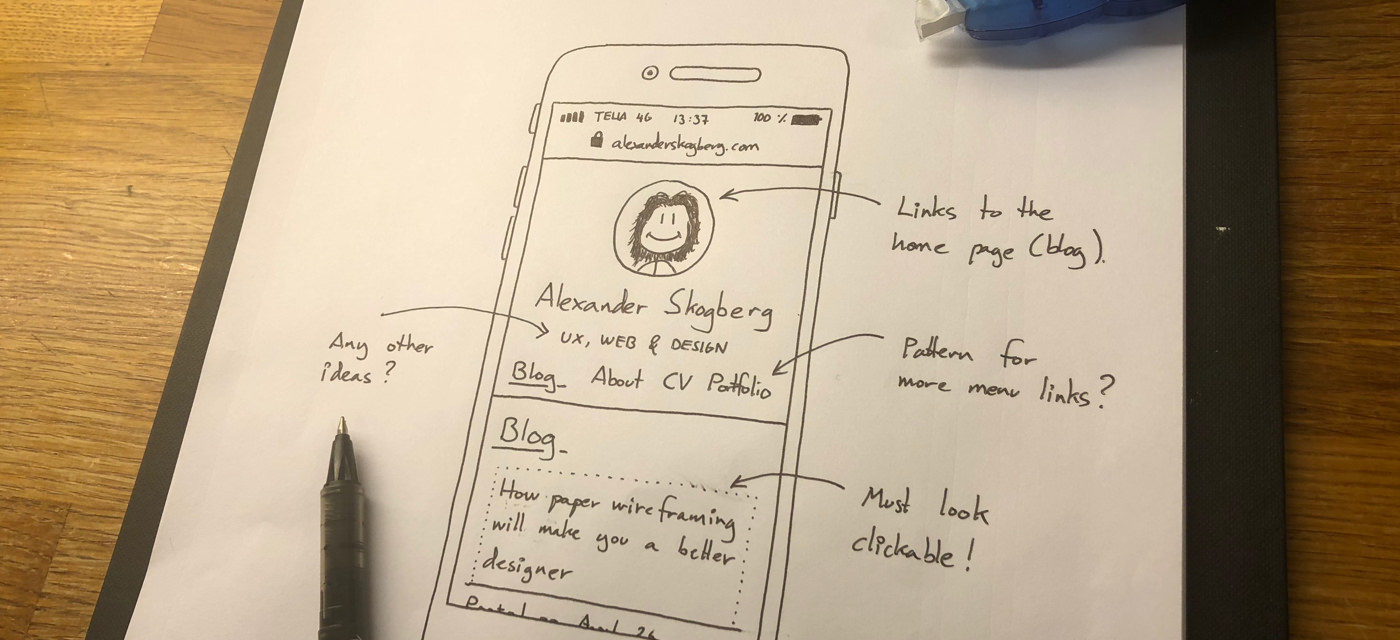
How paper wireframing will make you a better designer
Posted on April 25, 2018
There are lots of great tools for drawing wireframes today. However, I still prefer my good ol’ paper wireframing kit. In this post I’ll tell you why and explain how paper wireframing will make you a better designer.
In 2012 I was planning on taking my wireframing skills to the next level. I had gotten the excellent app Paper by FiftyThree for my new iPad and had ordered two well-reviewed tablet sketching pens all the way from the US.
Around this time, I also took a paper sketching course by the Swedish designer Mårten Angner. Taking this course completely changed my approach to making wireframes and over the years it has made me a better designer.
Let me tell you why paper wireframing is a must-have skill.
It’s including
I’ve been a member of many cross-functional teams in lots of projects over the years, and I’ve learnt that making paper wireframes together makes team members feel included. They appreciate having their voices heard and being able to contribute right from the start.
In some cases, developers have even thanked me for this approach to wireframing. They’ve explained their frustration with designers that interact with them too seldom and suddenly hand over bloated Photoshop files.
It’s accessible
Not everyone is experienced in graphic editors or prototyping apps like Axure, Balsamiq, Sketch or Photoshop, but everyone can draw on paper!
Some might insist that they are terrible at drawing, and while that often is true it’s not important for this type of design work.
Just grab some paper sheets from the nearest office printer, get some thin markers, and start drawing!
It’s shareable
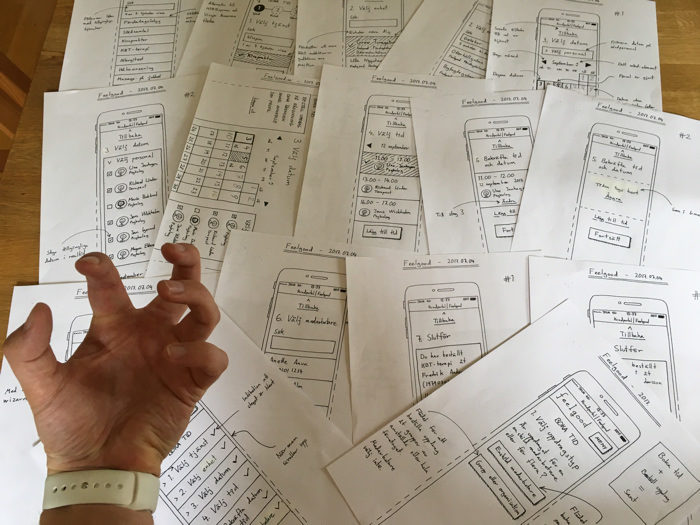
Paper wireframes are easy to share. Just scan them and print some copies using your office printer before handing them out to whomever benefits from seeing them. Having your own copies makes it easier to do edits on your own and if someone loses their copies it doesn’t matter.
It’s a good idea to take photos of your wireframes and upload them to Dropbox, Google Drive or add them to a board in InVision or Marvel.
Tip: Apps like Genius Scan and Post-it Plus are great for taking photos of sketches on paper.
It’s powerful
When I started drawing paper wireframes on a regular basis in projects, I noticed three major positive effects it had.
First, issues are caught earlier. I learnt that the teams I was in started identifying minor and larger issues much sooner than I was used to from before.
For example: It’s one thing to talk about an e-commerce checkout page, but when you start sketching you will identify time-consuming technical challenges, tricky little details and things no one even knew about.
Seeing is more powerful than hearing.
Second, paper wireframing saves a lot of time, money and energy. If you identify and solve issues on paper, it’s much cheaper compared to doing it well into development. Then, even the smallest alteration can be costly and frustrating.
Third, since I started drawing paper wireframes and used them when presenting design not even once has anyone asked me the (often judging) question “Is it supposed to look like that?”. Everyone knows it’s work in progress.
I’ve also noticed that drawing paper wireframes is great for driving political decision. When a feature goes from words to paper early on, it gets more “real” for a lot of stakeholders. This often acts as a catalyst for decision making.
Tips for drawing paper wireframes
Here’s some tips I’ve picked up for actually drawing on paper.
Get the right gear
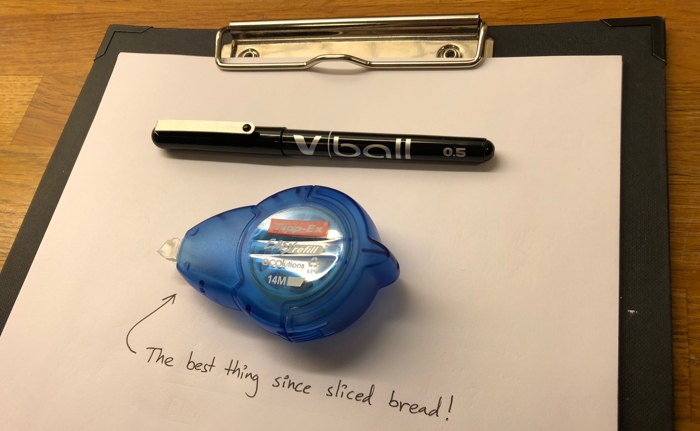
When you’re drawing on paper you’re not that dependent on gear, but there are some stuff you should invest in; a sturdy sketchpad, some correction tape rollers and a few thin black markers.
Sketchpad
Make sure to get a sketchpad with a clip-on and reinforced edges. A clip-on is great for easily adding and removing paper sheets. Reinforced edges will reduce wear and tear, since you’ll likely be taking the sketchpad it in and out of your bag a lot.
The sketchpad I’m using was included in the course I took in 2012. It’s not clearly branded, so I don’t know where you can get this exact model.
Correction tape roller
When I started drawing paper wireframes, I didn’t know correction tape on rollers even existed. Now, I depend on this brilliant little invention almost as much as on my Macbook or iPhone. It removes misses easily and dries immediately after applying it.
I prefer rollers from Tipp-Ex.
Thin black markers
I’d recommend getting 0.7 mm and 0.5 mm black markers from Pilot. They are affordable and don’t dry up until they are (almost) completely empty.
The 0.5 mm marker is best used for writing text and drawing minor details thanks to its higher precision. The 0.7 mm marker is suitable for drawing everything else. Nowadays, I solely use 0.5 mm black markers since I prefer their high precision.
It might also be worth getting red and green markers for making annotations of approved and disapproved design choices in your wireframes.
Why not just use a lead pencil and good rubber?
There are two reasons for using markers instead of lead pencils and rubbers:
Using markers will make you more focused while drawing and thereby you’ll make less mistakes. You’re always alert because screwing up is costly (unless you have a correction tape roller).
Wireframes drawn using markers will also look much better when photographed or scanned thanks to the high contrast compared to lead pencils.
Practice sketching the basics
Most of my paper wireframes consist of two elements; straight lines and round circles. If you master drawing these two elements, you’re on easy street.
Some tips for drawing straight lines and circles:
- Relax and loosen your shoulders
- Keep your back straight (you’ll thank me later)
- Put the tip of your marker on the paper before moving it
- Draw at a consistent speed
- After reaching your end point, lift the marker and slow down while in the air
Drawing circles is trickier. I recommend “drawing” the circle two or three times in the air before drawing it on your sheet of paper. See it as warming up before lifting weights at the gym.
Remember: There are no shortcuts. Practice, practice and practice drawing those lines and circles!
Draw, scan and copy templates
When I’m drawing wireframes, I usually draw the outlines of a smartphone or a web browser window before drawing the rest of the wireframe inside these outlines.
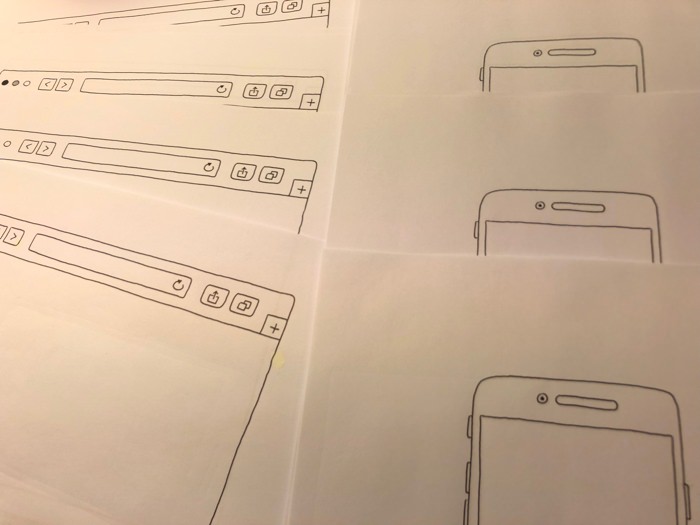
Drawing outlines like this gives people viewing your wireframes more context. If they’re gonna look at wireframes of a future smartphone app, it simply makes sense to draw the surrounding smartphone too.
Drawing outlines for each sheet of paper does quickly get very tiresome, so I always draw one empty outline that I scan and print copies of. This saves a lot of time and energy (and ink in my pens).
Add the right type and amount of details
While I think paper wireframes should focus on content, layout and order, adding some nice details can elevate their status as deliverables and help steer the later graphic design work.
Examples of nice details can be:
- The client’s logo (definitely learn how to draw this)
- Pieces of text drawn in different styles (serif and sans-serif)
- Logos of potential other brands to be featured
- Icons in addition to just labels on buttons and links
Tip: If you need inspiration for drawing icons, visit fontello.com and take your pick.
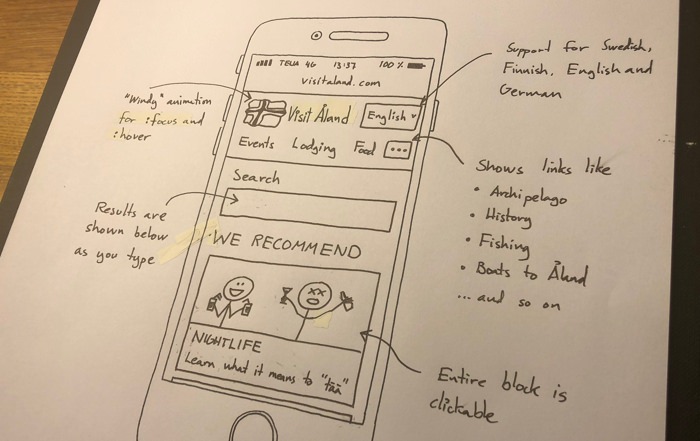
Tip: If you don’t want to write text, draw some Morse code lines instead. Just never write lorem ipsum text.
For drawing photos, empty rectangles with a diagonal lines running through them is boring. Embrace your inner child and draw like you did in kindergarten when you’re drawing a photo.
Practice drawing simple variants of everyday objects like:
- Cars, busses and boats
- Different types of houses
- Smartphones, tablets and laptops
- People (stick figures with smiley faces is more than enough)
- Trees, bushes and skies with clouds and birds
Write annotations
Paper wireframes lack the interactivity of clickable prototypes, but just adding some annotations can go a long way in explaining behaviour, logic and dependencies for the developers in your team.
I often write annotations explaining:
- How a disabled element will become active again
- What clicking certain elements will trigger
- Different supported formats for an input field
- Variations of pieces of content
- Dynamic updates when entering input
- Likely interface animations
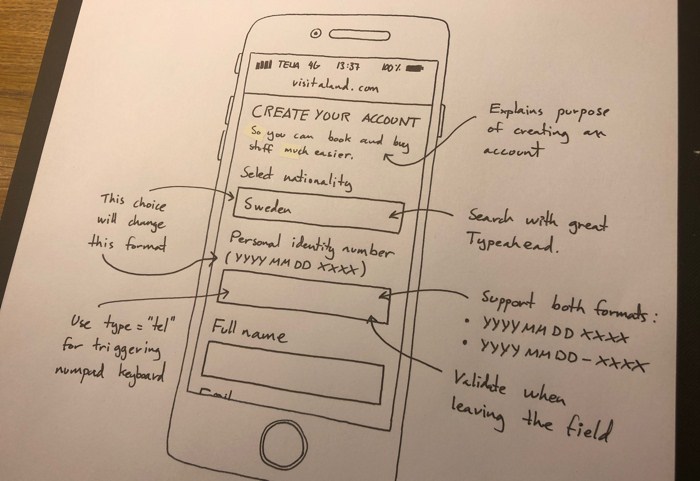
Name and date each wireframe
For every project I’m working on, I usually end up with a large stack of paper sheets. That’s why I at the top of each sheet write a name of what I’m drawing and on which date I drew it.
Organising my wireframes like this has saved me a lot of time over the years.
Wrapping up
Paper wireframing is a powerful, time-saving and accessible skill for making great design while including team members and stakeholders in the process. Vector graphic editors and prototyping apps are definitely sweet, but not always easier to get started with.
In my opinion, this type of wireframing is always suitable at some point during your design process. Take advantage of it!
Do you have any advice on this topic you think I should include in this post? Let me know in the comment section.
Happy paper wireframing!
Oh, by the way! If you need to move on from paper wireframes in your project, please read my post How to make great wireframes in Sketch.
/Alexander