Prototype like a pro with inVision
Posted on April 9, 2017
For the past year and a half, I’ve been using the web app inVision for sharing design and making clickable prototypes. With this post I wanted to share some tips on how to prototype like a pro.
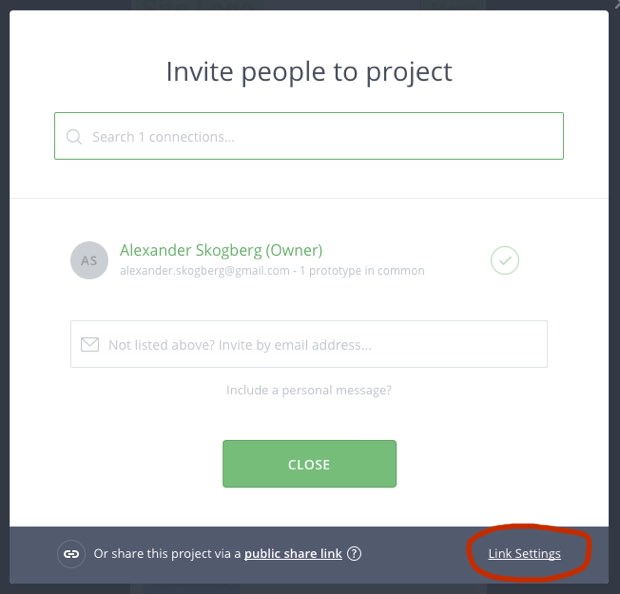
inVision is a widely popular web app for making clickable prototypes and sharing, storing and collaborating on design. It’s used by companies such as Netflix, Adobe, Twitter and Uber.
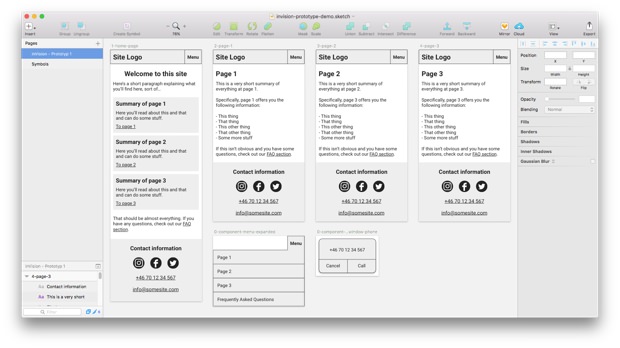
When working with inVision, you don’t create wireframes or graphic design in the app. This is done in your graphics editor of choice and you just upload the exported images to inVision.
Then, you place so called hotspots on these images that simulate the intended future behaviour of your design.
inVision has in no time at all turned into one of my all time favourite digital tools along Trello, Dropbox and Google Drive.
Here’s some of my tips on how to prototype like a pro with inVision.
1. Number images for better sorting
When you upload images to a prototype in inVision, they’re sorted alphabetically. This can be frustrating if you have uploaded a lot of images.
If you want the images to be ordered in a certain order, number them like this:
- 1-first-view.jpg
- 2-second-view.jpg
- 3-1-third-view.jpg
- 3-2-third-view-variant.jpg
- 4-fourth-view.jpg
2. Save popular hotspots as templates
If you have a hotspot that will be used on several views, save it as a template hotspot and reuse it later.
If you’re making a prototype for a typical website, a template hotspot is perfect for a clickable header logo that brings you back to the home page.
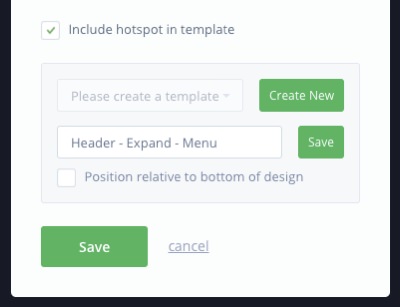
If you end up with lots of template hotspots, set up a naming convention for keeping them in order. For example, something like this:
- Header – Expand – Search
- Header – Expand – Menu
- Header – Link – Logo
- Footer – Link – Contact Form
- Footer – Link – Opening Hours
- Footer – Link – Login Page
- Footer – Modal – Phone Number
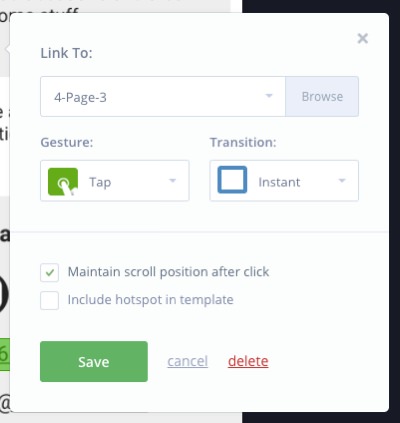
3. Maintain scroll position when suitable
When you click on a hotspot leading to a new view, it makes sense that the next view is scrolled to the top.
However, if a hotspot leads to a variant of the same view (with a minor edit), you probably want to maintain the scroll position. If user click on a hotspot and end up at the same view scrolled to the top after a page reload, they might be confused.
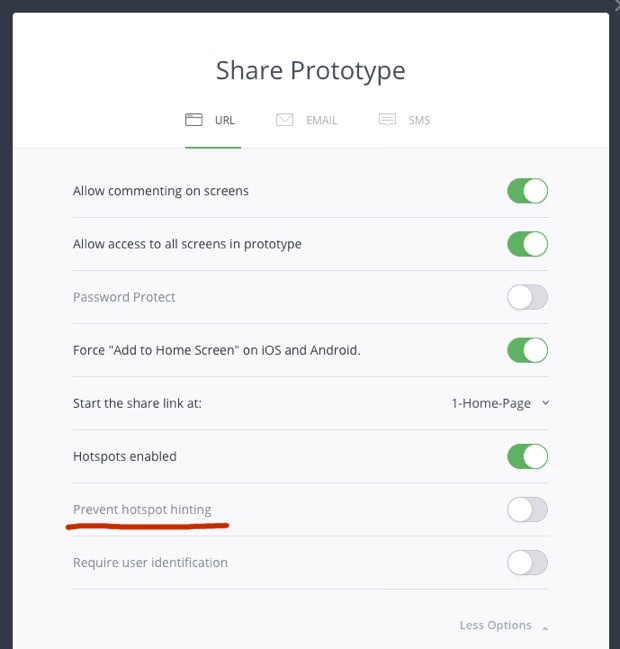
4. Turning off hotspot hinting
By default, hotspots are hinted if you tap on an area of the screen not covered by a hotspot.
However, if you’re observing a usability test you might not want to show these hints to the user. Watching them figuring out where to click on their own might be preferable.
These hints can be deactivated, but the action for this is hidden. This is how you do it:
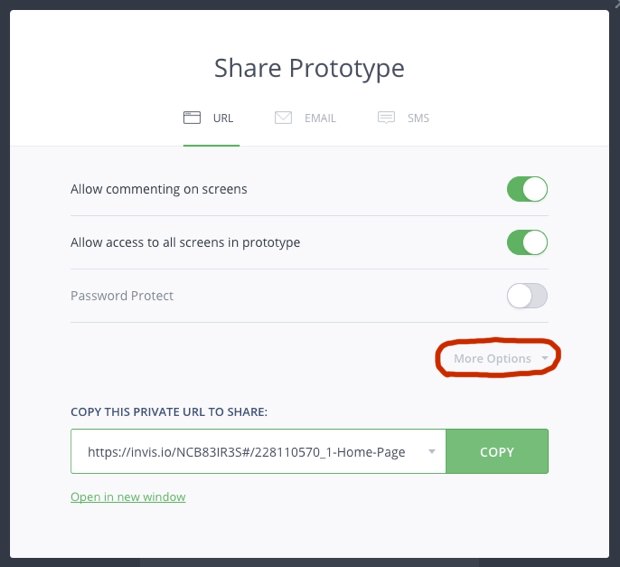
5. Set the start screen
The start view of your prototype will automatically be the first of the alphabetically sorted views. You can change this action, but it’s hidden in the same section as deactivating hotspot hinting.
6. Reduce views with the overlay feature
A fairly new feature in inVision is the possibility to use exported images as overlays on top of other images.
Using this excellent feature will reduce the number of exported images needed and will provide richer interactivity in the prototype.
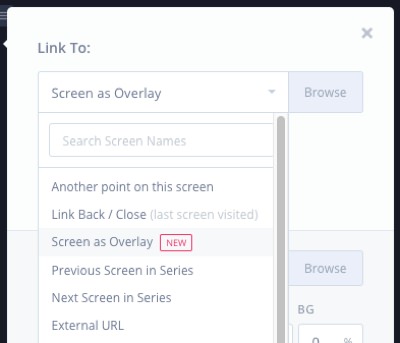
Imagine you’re prototyping a mobile app with eight views that all have a hamburger menu in the top. If you want users to be able to expand the hamburger menu on every view, you don’t have to make two variants of each view (one with the menu closed, one with it opened).
You just need to create a (template) hotspot for the menu button and show the expanded menu as an overlaid image.
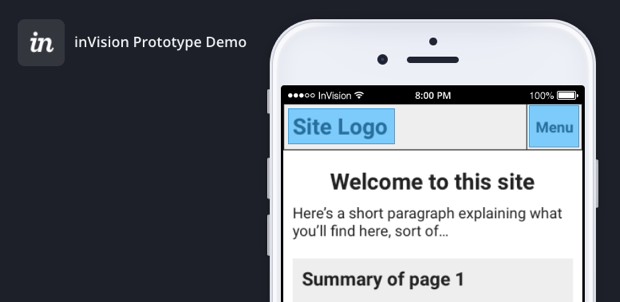
Finally, the prototype
Following these tips, this is the prototype I’ve created.
Let me know your tips
inVision has lots of other features and nice design details that I haven’t mentioned above. If you feel there’s something I must add, please let me know in the comment section.
Otherwise, happy prototyping!
/Alexander